
Home Makeover - Part I - Media Room/Toy Room
Along with organizing, I
LOVE
decorating
. I think the two go hand in hand. I don't claim to even compare with the "professionals" but I truly believe that I have been given a gift of creativity from our Father in
Heaven
, and I feel that all the glory goes to Him!
With that being said, My friend, Janda is expecting her 3rd child soon. She wanted me to do some rearranging in her home and was hoping to get some ideas on organizing her children s toys before their little "man" arrived.
This is
Part I
of her home makeover - The Media Room / Toy Room
She has an absolutely gorgeous place & it was a
DELIGHT
for me to make her families home into a cozier, warmer space using mostly all of their own stuff, with just a few new pieces. The only "new" pieces this space has received aren't actually "new." They
came from other spaces in the home. I made a few suggestions on what they could purchase for this room.
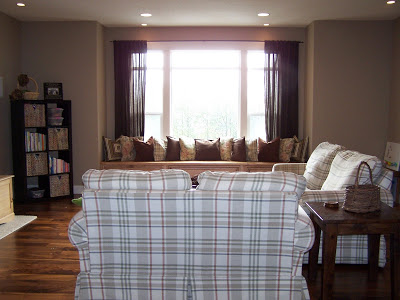
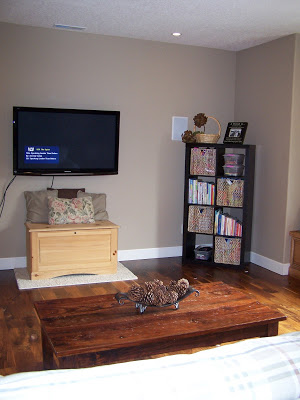
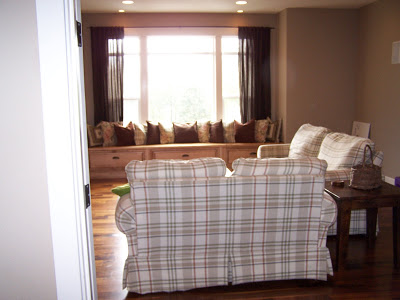
Here are the
BEFORE PHOTOS
of the Media Room/Toy Room:
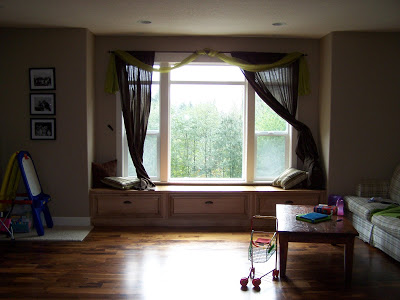
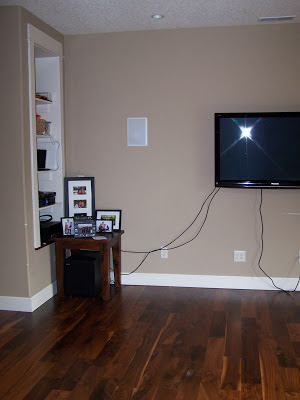
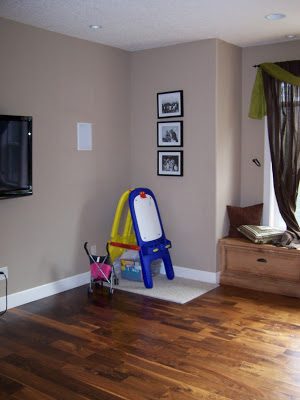
Great space, just needed a little rearranging.
This is what I did to the space:
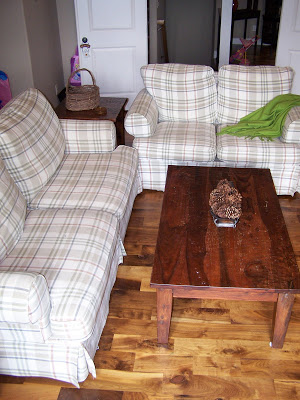
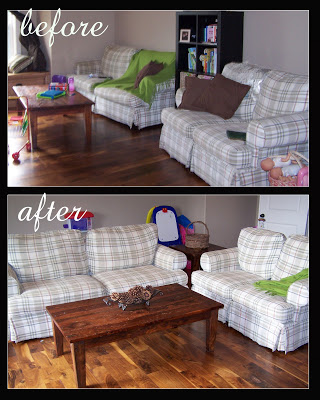
#1 - THE COUCHES, END TABLE & COFFEE TABLE
FOUND A NEW RESTING PLACE
I moved the couches away from the wall and brought them toward the middle of the room to make a cozy sitting area across from the TV and centered with the window. Moved the end table between the couches & the coffee table in front of the couches.
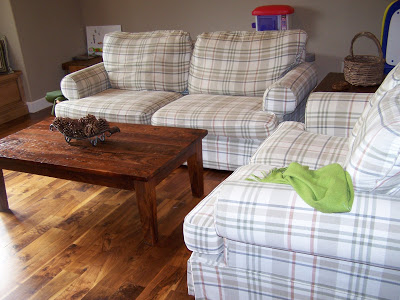
Looks better huh? Notice... all the large toys stayed behind the couches. Oh, and you can't see it real well, but I found a little child's desk & chair (see it in the left hand corner?) in their garage, so I brought it in here. This desk was Janda's when she was little. SO CUTE!
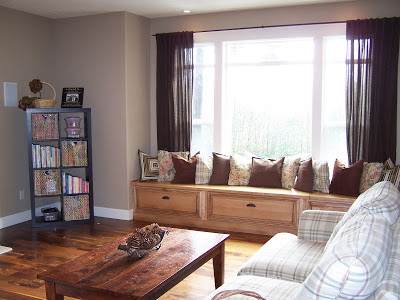
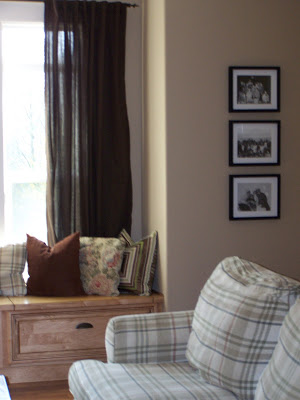
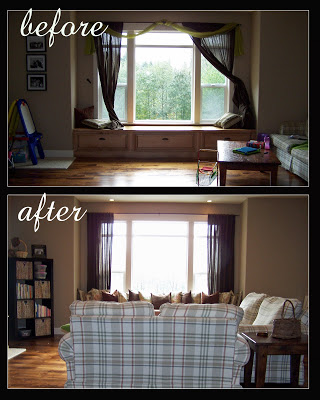
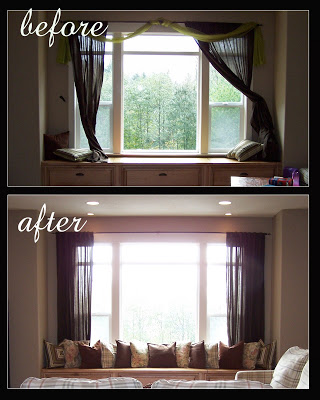
#2 - THE WINDOW SEAT GOT A SMALL TRANSFORMATION
I removed the green curtain swag from above the window, and adjusted the panels to hang a little straighter. See those little drawers under the window, there were a bunch of pillows stashed in them, so I pulled them out and filled the window seat full of pillows.
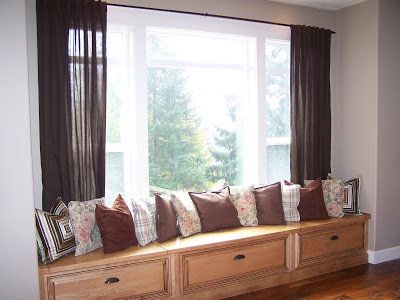
Look at what a difference that makes:

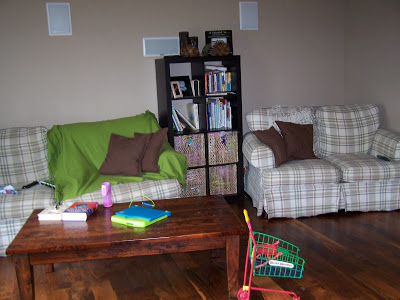
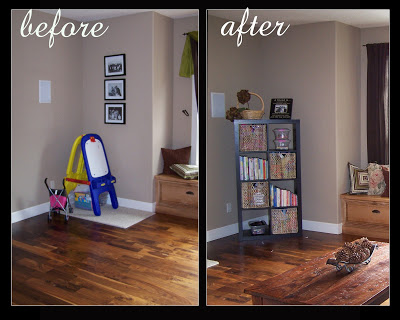
#3 THE BOOKCASE WAS MOVED AND ITEMS ON IT WERE REARRANGED
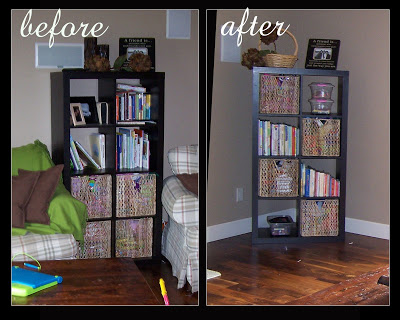
Remember the bookcase cubicle housing the little baskets?

That piece was moved to the opposite side of the room.
I staggered the baskets to make for a more uniform look.
I suggested that she buy another
and more
(for more toy & book storage)
Both from IKEA.
And also some kind of entertainment unit for underneath the TV to hold DVD's, Wii stuff, etc.
And to hide those cords too.
When she is able to buy the other pieces of furniture, I suggested that she place both bookcases on either side of the TV. But for now, we cornered the bookcase.

and for the time being, we also placed a chest under the TV - to hide some of those cords. The chest holds some of the larger toys that can't fit in the baskets. (The chest was in her back mudroom, so we stole it - sometimes, just shopping in your own home & using your items/furniture from another room, makes a huge difference.)
The chest would definitely be better if it were black, but remember this is just "for the time being" until she can buy the other bookcase, and the entertainment unit for underneath that TV. For one, the unit would be black and would be a little wider.
Janda plans to do all black & white with some damask in this room & it will be
ADORABLE
! But for now, to fit the budget, we used what we could to make the space work. Feels like a whole new room, and all we did was move things around a bit.
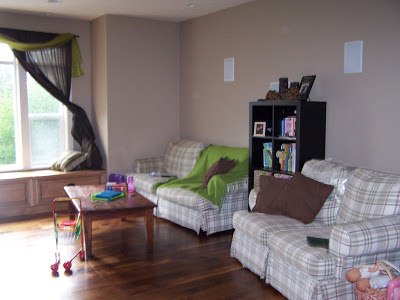
Here are some more
AFTER PHOTOS
of the room:

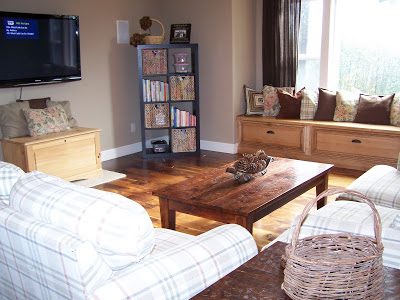
Check out the before and afters again:
Part II of this home make-over COMING SOON!
May you be a little inspired!
Until next time,
DaNita